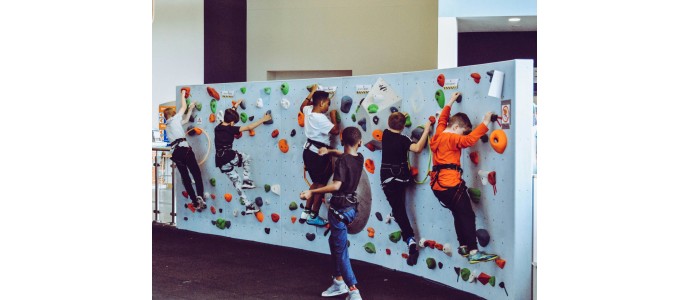
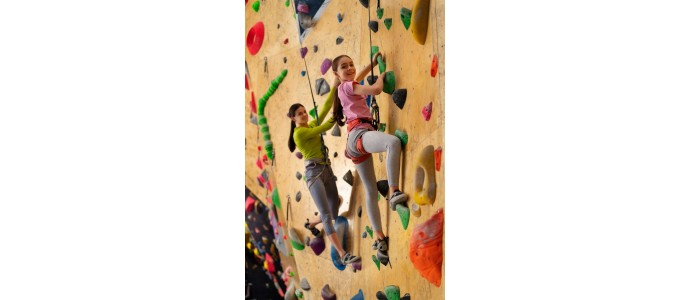
How to place climbing holds on a concrete wall
The proper installation of climbing dams on a concrete wall is essential to ensure the safety and durability of the climbing structure. Correct installation not only maximizes user safety, but also ensures longevity and optimal performance of holds and climbing volumes.
Materials and tools required
To ensure safe and durable installation of climbing holds on a concrete wall, it is crucial to use the right materials and tools. Each of the necessary elements is detailed below.
Materials
Climbing Holds Climbing holds are the basic elements that are attached to the wall to create the support and grip points. These can be made of materials such as polyurethane or polyester, which are durable and offer good grip.
- Features: Variety of shapes and sizes to fit different levels of difficulty.
- Quality: It is important to choose high-quality dams to ensure their durability and performance.
Impact studs M10 Impact studs are anchors that are inserted into the concrete wall to secure climbing dams.
- Features: M10 diameter studs, which provide a sturdy fastening.
- Usage: They are inserted into perforated holes in the wall and expanded to ensure a firm fit.
Allen screws Allen screws are used to fasten the joints to the studs.
- Features: High strength, typically steel screws with a head that fits with an allen wrench.
- Size: The size of the screw will depend on the depth of the plug and the thickness of hold.
Epoxy resin (optional) Epoxy resin can be used in situations where additional fixation is required or when the concrete wall has irregularities.
- Use: Applied in holes before inserting the studs to ensure greater adhesion.
- Advantages: Improves stability and safety of wall anchors less
Tools
Drill The drill is essential for drilling holes in the concrete wall where the striking blocks will be inserted.
- Features: Preferably a percussion drill, which facilitates drilling on hard surfaces such as concrete.
- Precision: Must be able to handle drills of different diameters.
Drills of different diameters Drills are needed to drill holes in the wall. Drill bits of different diameters are used for initial and final drilling.
- Initial diameter: Smaller bit for preliminary drilling.
- End diameter: Drill bit of the appropriate size for M10 punch plugs (usually 12 mm).
Cleaning brush The brush is used to clean the drilled holes, removing dust and debris that may affect the fixing of the studs.
- Usage: Clean the hole before inserting the plug.
- Types: It can be a hand brush or compressed air tool.
Hammer The hammer is used to insert and fix the punch studs into the drilled holes.
- Features: Must be sturdy enough to apply force without damaging the studs.
- Usage: Hit the peg to secure it in place and expand it into the hole.
Allen wrench The allen wrench is essential for adjusting the allen screws that fix the plugs to the studs.
- Size: Must match the size of the screws used.
- Quality: A good quality wrench ensures proper fit without damaging the screws.
Level The level is used to ensure that dams are placed evenly and level.
- Accuracy: Ensures that the dams are not crooked and are aligned correctly.
- Types: Can be a traditional bubble level or laser level for precision

Preparation of surface
Proper surface preparation is essential to ensure that climbing holds adhere properly and remain secure in place. This process includes inspection and cleaning of the concrete wall to ensure optimal installation.
Inspection and cleaning
Inspecting the wall Before proceeding with the installation of holds, it is crucial to carry out a thorough inspection of the concrete wall. This inspection helps to identify any potential problems that may affect the safety and efficiency of the installation.
Check for cracks and damage: Ensure that the surface is free of cracks, fissures or any type of structural damage that could compromise the integrity of the installation. Cracks can weaken the wall and cause holds to not adhere properly.
Evaluate uniformity: Verify that the wall surface is uniform. Irregularities can make installation difficult and affect dam safety. If problem areas are found, they may need to be repaired before proceeding.
Environmental conditions: Make sure the wall is completely dry. Moisture can affect the adhesion of the blocks and resin.
Installation procedure
Proper installation of climbing holds on a concrete wall requires meticulous procedure to ensure that holds are firmly anchored and safe for use. The step-by-step procedure is described below.
Drilling of the wall
Mark installation points The first step in drilling is to determine the exact location of each climbing hold.
Use a level: Make sure the dams are properly aligned using a level.
Measure carefully: Use a tape measure to properly space hold. Mark the points with a pencil or chalk where the holes will be drilled.
Initial drilling Starting with a preliminary drill is crucial to guide the drill in the correct direction and avoid deflections.
Use a smaller diameter bit: Start with a bit smaller than the final bit needed. This facilitates control and accuracy during initial drilling.
Proper depth: Make sure that the preliminary drill is deep enough to guide the larger diameter bit in the next step.
End drilling Extending the initial hole to the appropriate diameter for the punch plugs ensures a firm fixation.
- Drill to required depth: The hole depth should be adequate so that the stud is completely flush with the wall surface.
- Insertion of the butt plug Placing the butt plugs correctly ensures a solid base for hold.
Placement of the studs
Hole cleaning It is essential to remove any residue inside the hole drilled to ensure that the plugs are properly fixed.
- Remove dust and debris: Use a brush or compressed air to clean the hole completely. Any residue may prevent the correct fixing of the taco.
Insertion of the butt plug Placing the butt plugs correctly ensures a solid base for the prey.
- Place the taco in the hole: Insert the punch into the hole.
- Hammer gently: Use a hammer to hit the cue until it is flush with the wall surface.
Fixing the cleat Securing the cleat in a blow is crucial for the stability of holds.
Use a butt: Insert a butt into the inside of the taco.
Expand the butt: Hit the butt with a hammer to expand the butt into the hole. This process firmly anchors the block to concrete, providing a secure base for the Allen screws that will fasten hold.

.jpg)


Comments
No comment at this time!
Leave your comment